1、概述
| 网站架构 | 说明与特点 | 性能 | 1句话说明 |
|---|---|---|---|
| 静态网站 | 网站仅仅包含:html、css样式、js脚本、图片、视频 nginx直接处理的资源,即静态资源 | 只需要web服务器即可,不支持动态的功能,如:注册、评论等 静态网站功能单一 | 浏览器端解析(客户端解析),服务端仅仅负责发送 |
| 动态网站 | 一般是通过开发语言实现,如:java、PHP、Python、golang等等 | 动态资源页面需要服务器进行处理,如:nginx+php/pyhton+…+数据库 ,处理后把结果返回给用户 | 动态请求需要服务端进行处理与解析,把结果返回给用户 |
如何区分静态资源和动态资源
通过url简单和初步判断网站的类型
url中包含&或?的一般都是动态网站
2、常见动态网站的架构
PHP:LNMP(LEMP)、LAMP、WNMP/WAMP(P—>PHP,W—>Windows,A—>Apache)
java:LNMT(Tomcat,Jetty,Weblogic,JBoss)
Python:LNMP(Python、uwsgi)
Golang:LNMG(golang)
C/C++:LNM?….
L:Linux
N:nginx、engine X
M:mysql、mariadb
A:Apache
3、LNMP架构细节
环境准备
| 角色 | 主机与ip |
|---|---|
| 数据库 | db01、192.168.10.51、172.16.1.51 |
| nginx+php | web01、192.168.10.7、172.16.1.7 |
版本选择:
1、nginx一般没有版本要求,稳定版本即可
2、php版本根据代码来定。这里使用php74(即7.4)
3、数据库,根据代码来定。这里使用mariadb5.5
3.1 数据库端
数据库服务器:192.168.10.51、172.16.1.51,主机名:db01
1)mariadb安装
#1、安装mariadb数据库服务端
#mariadb-server:服务端
#mariadb:客户端
[root@db01 ~]#yum install -y mariadb-server
[root@db01 ~]#systemctl start mariadb
[root@db01 ~]#systemctl enable mariadb
2)数据库安全配置
#首次安装数据库需要执行,仅仅需要首次运行
[root@db01 ~]#mysql_secure_installation  #用于设置数据库root密码,清理用户和临时库
Enter current password for root (enter for none):  #直接回车
Set root password? [Y/n] y  #输入y,设置root密码
New password:           #输入密码,这里使用12345
Re-enter new password:    #确认密码

Remove anonymous users? [Y/n] y  #输入y,清理匿名用户
Disallow root login remotely? [Y/n] y  #输入y,禁止root远程登录
Remove test database and access to it? [Y/n] y  #输入y,删除测试数据
Reload privilege tables now? [Y/n] y  #输入y,刷新授权表
Thanks for using MariaDB!
3)登录数据库
[root@db01 ~]#mysql -uroot -p12345  #-u指定用户,-p指定密码
Welcome to the MariaDB monitor.  Commands end with ; or \g.
Your MariaDB connection id is 10
Server version: 5.5.68-MariaDB MariaDB Server

Copyright (c) 2000, 2018, Oracle, MariaDB Corporation Ab and others.

Type 'help;' or '\h' for help. Type '\c' to clear the current input statement.

MariaDB [(none)]>
OK,登录数据库成功。
4)sql语句
1、查看数据库:show databases;
MariaDB [(none)]> show databases;
+--------------------+
| Database           |
+--------------------+
| information_schema |
| mysql              |
| performance_schema |
+--------------------+
3 rows in set (0.01 sec)

MariaDB [(none)]>
2、创建数据库: create database 数据库名称;
MariaDB [(none)]> create database  mydb;       #创建名为mydb的数据库
Query OK, 1 row affected (0.00 sec)

MariaDB [(none)]>
MariaDB [(none)]> create database wordpress; #创建名为wordpress的数据库3、删除数据库:drop database 数据库名称;
MariaDB [(none)]> drop database  mydb;    #删除mydb数据库
Query OK, 0 rows affected (0.00 sec)

MariaDB [(none)]>
4、创建访问数据库的用户:
创建访问wordpress数据库的用户,用户名:wp,密码:12345
MariaDB [(none)]> grant all on wordpress.* to 'wp'@'localhost' identified by '12345';
MariaDB [(none)]> grant all on wordpress.* to 'wp'@'172.16.1.%' identified by '12345';
MariaDB [(none)]> flush privileges;   #刷新授权表
命令解释:
grant 权限 on 数据库.表 to '用户名'@'白名单' identified by '密码';权限:增删改查,all表示所有
白名单:表示用户可以从哪里进行登录与使用数据库,localhost表示只能在数据库本地使用。也可以写成:172.16.1.%,表示该网段可以访问,但%不包含localhost
数据库.表:表示数据库中的表,.*表示所有表
identified by ‘密码’:设置用户密码
创建的用户,其信息保存在mysql数据库中的user表。
5、查看数据库的表的结构: desc 表名称或数据库.表名称;
MariaDB [(none)]> desc mysql.user;
+------------------------+------------
| Field   | Type     | Null | Key | Default | Extra |
+------------------------+---------------------------
| Host    | char(60)   | NO   | PRI |   |     |
| User    | char(16)   | NO   | PRI |   |     |
| Password | char(41) | NO | | | |6、查看用户信息:select 字段 from 表或数据库.表名;
MariaDB [(none)]> select user,host,password from mysql.user;7、删除用户:drop user ‘用户名’@’白名单’;
MariaDB [(none)]> grant all on *.* to 'test'@'*' identified by '12345';
MariaDB [(none)]> drop user 'test'@'*';  #删除test用户
MariaDB [(none)]> flush privileges;     #刷新授权
增删改用户,必须执行“flush privileges;”命令
8、退出数据库:ctrl + d或输入:quit
5)远程登录测试
在web01端连接数据库
#1、安装mariadb客户端
[root@web01 ~]#yum install -y mariadb
#2、远程登录数据库
[root@web01 ~]#mysql -uwp -p12345 -h 172.16.1.51  #-h:指定数据库服务所在的ip
Welcome to the MariaDB monitor.  Commands end with ; or \g.
MariaDB [(none)]> select user();
+----------+
| user()   |
+----------+
| wp@web01 |
+----------+
1 row in set (0.00 sec)

MariaDB [(none)]>
OK,远程登录成功。至此,数据库服务准备成功。
3.2 web端
1)php74安装配置
1、安装php74
#1、删除旧版php
[root@web01 ~]#yum remove -y php*
[root@web01 ~]#yum remove -y remi-release.noarch

#2、安装php74
#配置php源
[root@web01 ~]#yum install http://rpms.remirepo.net/enterprise/remi-release-7.rpm
#安装php74及相关依赖包
[root@web01 ~]#yum install -y php74 php74-php-bcmath php74-php-common php74-php-cli php74-php-devel php74-php-embedded php74-php-fpm php74-php-gd php74-php-intl php74-php-mbstring php74-php-mysqlnd php74-php-opcache php74-php-pdo php74-php-pear php74-php-pecl-igbinary php74-php-pecl-memcached php74-php-process php74-php-xml

#3、启动php
[root@web01 ~]#systemctl start php74-php-fpm
[root@web01 ~]#systemctl enable php74-php-fpm  #设置开机启动
2、修改php74配置文件
php74主配置文件:/etc/opt/remi/php74/php-fpm.conf
子配置文件:/etc/opt/remi/php74/php-fpm.d/www.conf
修改子配置文件,把user和group改成:nginx,默认是:apache
[root@web01 ~]#vim /etc/opt/remi/php74/php-fpm.d/www.conf
user = nignx
group = nginx
修改配置文件后,要重启 php74-php-fpm服务, php74-php-fpm服务端口:9000
2)nginx安装
nginx官网:http://nginx.org/
这里使用 nginx-1.24.0
1、安装nginx
#1、配置nginx的yum源
[root@web01 ~]#vim /etc/yum.repos.d/nginx.repo
[nginx-stable]
name=nginx stable repo
baseurl=http://nginx.org/packages/centos/$releasever/$basearch/
gpgcheck=1
enabled=1
gpgkey=https://nginx.org/keys/nginx_signing.key
module_hotfixes=true
[nginx-mainline]
name=nginx mainline repo
baseurl=http://nginx.org/packages/mainline/centos/$releasever/$basearch/
gpgcheck=1
enabled=0
gpgkey=https://nginx.org/keys/nginx_signing.key
module_hotfixes=true

#2、安装nginx
[root@web01 ~]#yum install -y nginx
2、站点配置文件
[root@web01 ~]#vim /etc/nginx/conf.d/blog.conf
server {
 listen 80;
 server_name blog.com;
 error_log /var/log/nginx/blog-error.log notice;
 access_log /var/log/nginx/blog-access.log main;
 root /app/code/blog;

 location / {
    index index.php;
  }

 location ~* \.php$ {
    fastcgi_pass 127.0.0.1:9000;
    fastcgi_index index.php;
 #  fastcgi_param SCRIPT_FILENAME /scripts$fastcgi_script_name;
    fastcgi_param SCRIPT_FILENAME $document_root$fastcgi_script_name;
    include fastcgi_params;
 }
}fastcgi_params:/etc/nginx/fastcgi_params
3、创建站点目录
站点目录:/app/code/blog
[root@web01 ~]#mkdir -p /app/code/blog4、部署WordPress
WordPress官网:https://cn.wordpress.org/
#1、下载wordpress
[root@web01 ~]#wget https://cn.wordpress.org/latest-zh_CN.tar.gz

#2、解压
[root@web01 ~]#tar xf latest-zh_CN.tar.gz
[root@web01 ~]#mv wordpress/* /app/code/blog/
5、修改站点目录属主属组
站点目录/app/code/blog/属主属组修改为nginx
[root@web01 ~]#chown -R nginx.nginx /app/code/blog/6、启动nginx服务
[root@web01 ~]#systemctl start  nginx
[root@web01 ~]#systemctl enable  nginx
3)部署WordPress
浏览器打开:192.168.1.7
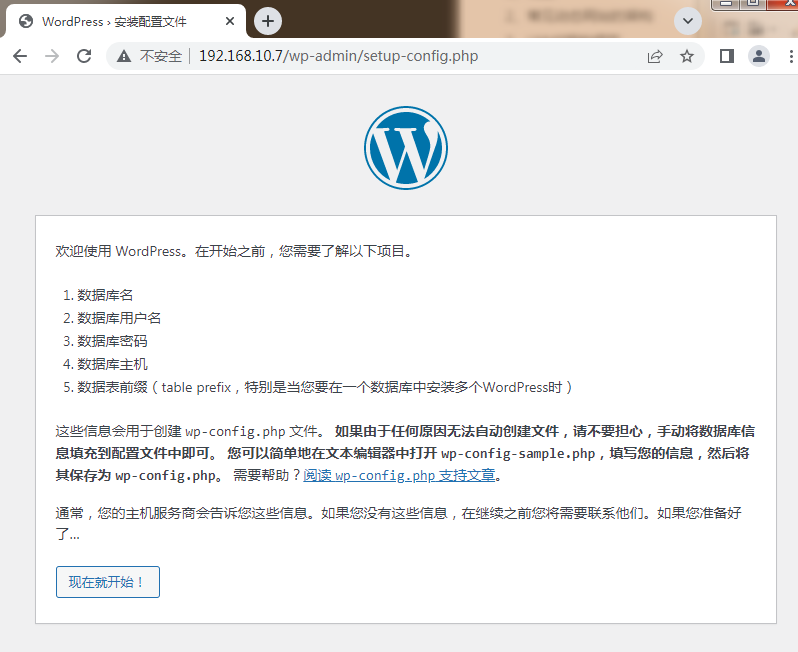
则进入WordPress安装流程。
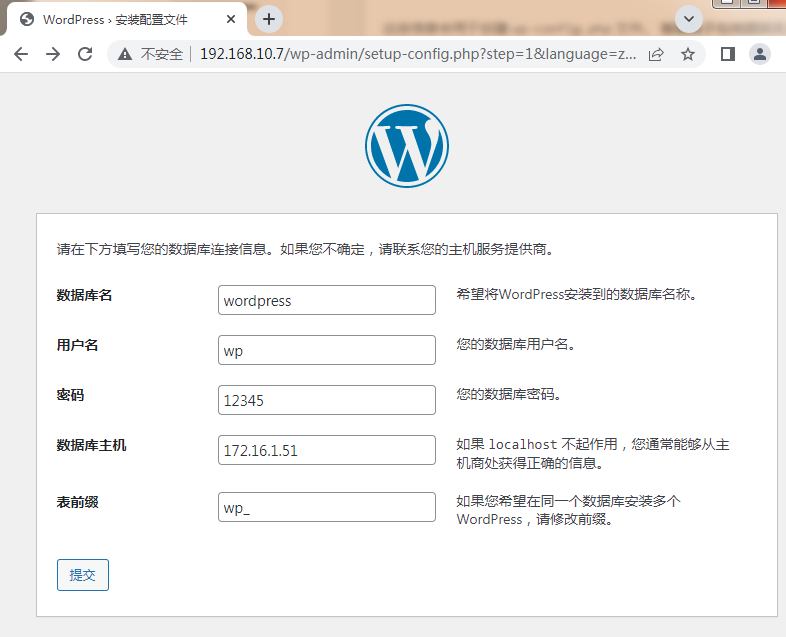
输入数据库名:wordpress
用户名:wp
密码:12345
数据库主机:172.16.1.51
点击提交即可。
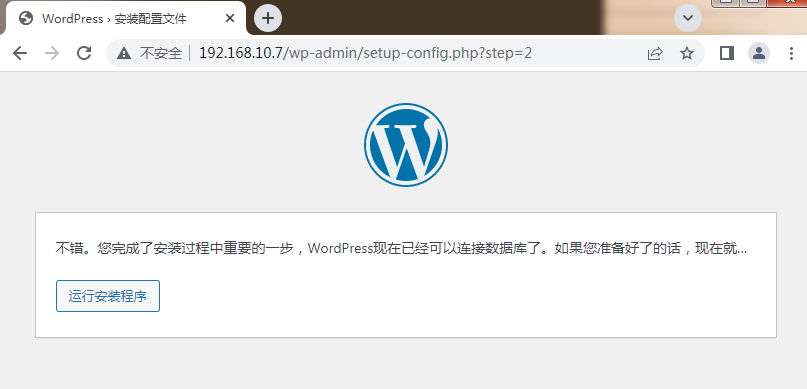
点击“运行安装程序”,进入正式安装流程:
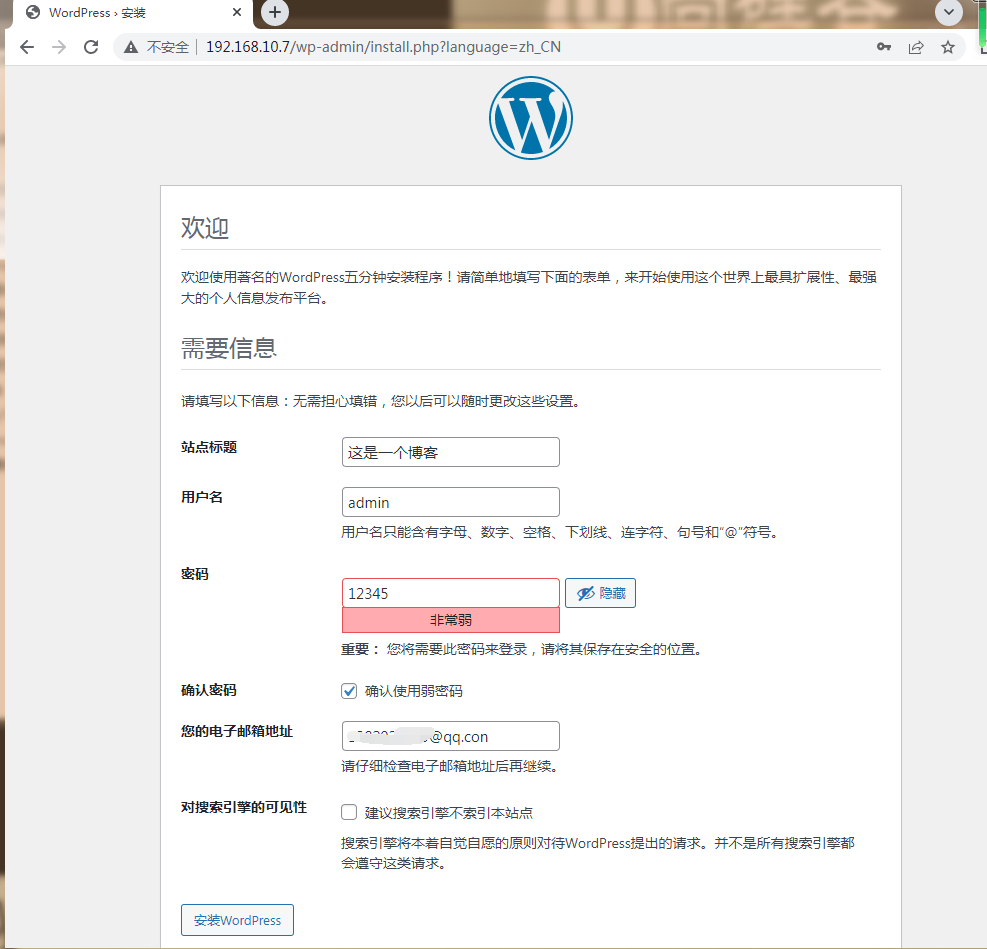
填写相关信息,点击“安装wordpress”即可。
安装成功如下图:
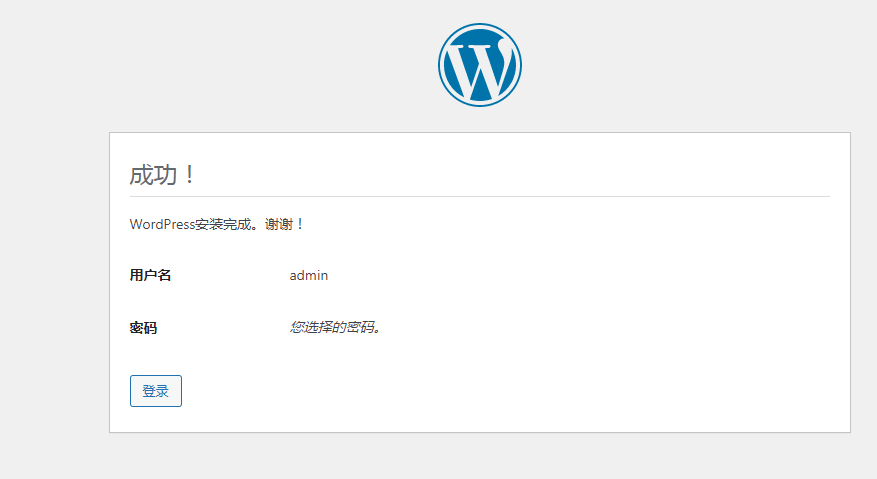
登录成功,如下图:

4)wordpress相关表
查看一下wordpress在数据库中的表
MariaDB [(none)]> show tables from wordpress;
+-----------------------+
| Tables_in_wordpress   |
+-----------------------+
| wp_commentmeta        |
| wp_comments           |
| wp_links              |
| wp_options            |
| wp_postmeta           |
| wp_posts              |  #保存文章的表
| wp_term_relationships |
| wp_term_taxonomy      |
| wp_termmeta           |
| wp_terms              |
| wp_usermeta           |
| wp_users              |  #用户表
+-----------------------+
12 rows in set (0.00 sec)
MariaDB [(none)]>
5)排错与调试
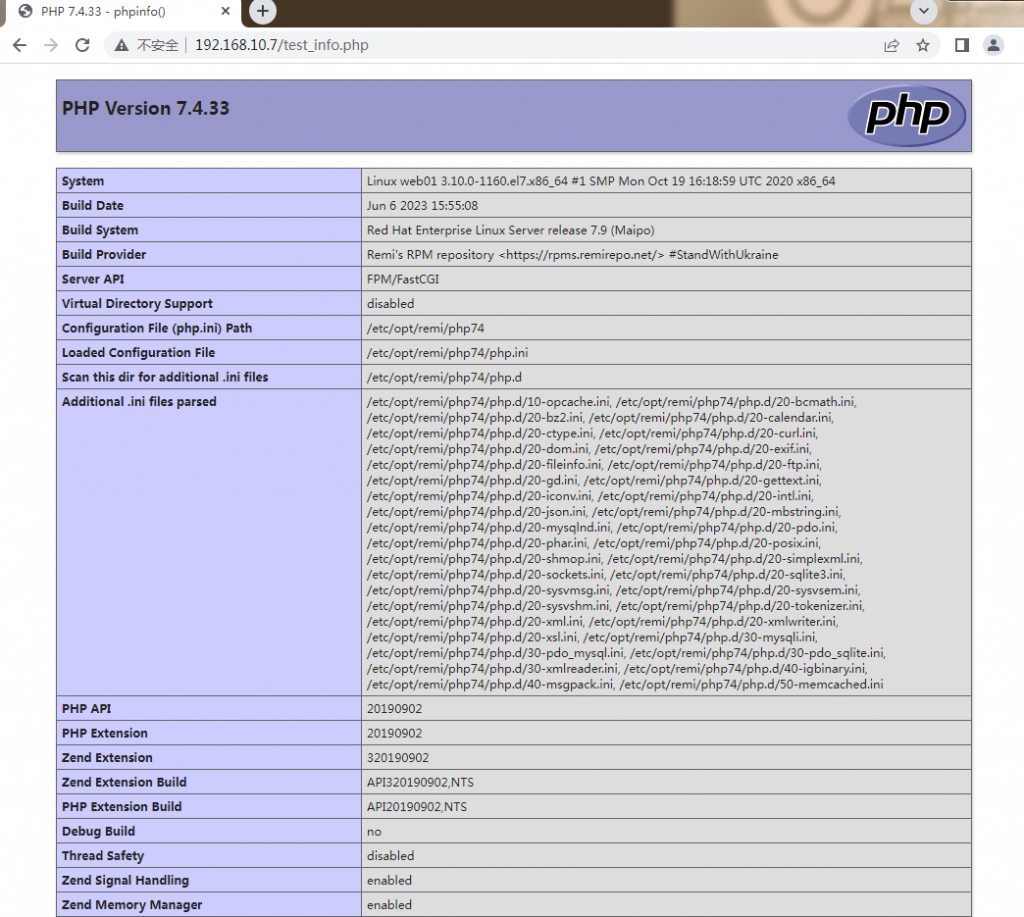
1、测试nginx+php静态页面
[root@web01 ~]#vim /app/code/blog/test_info.php
<?php
  phpinfo();
?>浏览器打开:http://192.168.10.7/test_info.php
显示如下,则表示成功
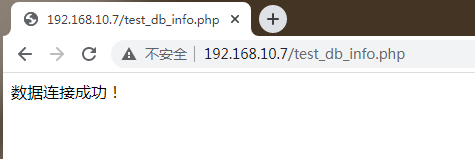
2、测试php+mariadb
[root@web01 ~]#vim /app/code/blog/test_db_info.php
<?php
//数据库地址
$db_host='172.16.1.51';
//数据库用户名
$db_user='wp';
//数据库用户密码
$db_pass='12345';
//数据库名
$db_name='wordpress';
$link_id=mysqli_connect($db_host,$db_user,$db_pass,$db_name);
if($link_id){
  echo "数据连接成功!\n";
 }else{
  echo "数据库连接失败!\n";
 }
?>浏览器打开:http://192.168.10.7/test_db_info.php
显示如下,则表示成功。
6)站点权限
在前面的设置中,站点目录/app/code/blog/目录属主属组是nginx,权限还是有点大,因此,可把wp-content属主属组为nginx,其他文件\目录均为root
[root@web01 ~]#chown -R root.root /app/code/blog/
[root@web01 ~]#chown -R nginx.nginx  /app/code/blog/wp-content/
3.3 接入存储
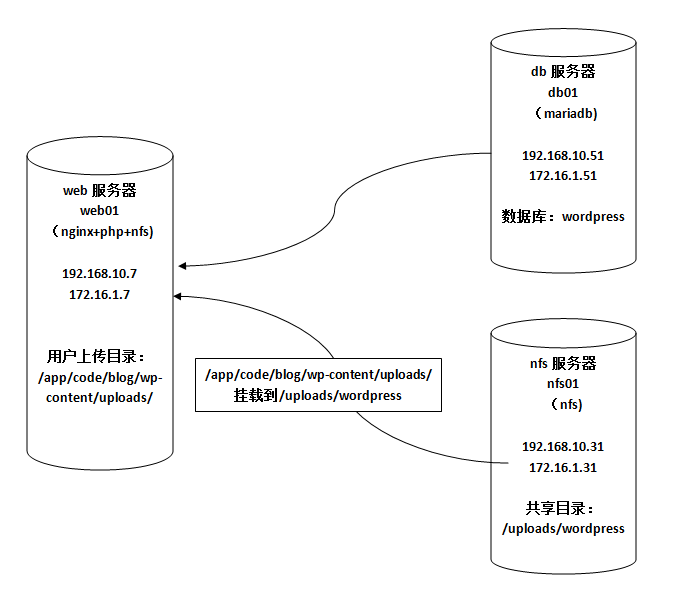
在前面部署的wordpress中,用户上传的数据保存在wp-content目录中,在负载均衡架构中可能会出现用户数据不一致的情况,因此要使用共享存储来解决这不一致问题。
| 角色 | 主机名 | ip | 说明 |
|---|---|---|---|
| 数据库 | db01 | 192.168.10.51、172.16.1.51 | |
| web服务 | web01 | 192.168.10.7、172.16.1.7 | 安装nfs,用户上传的目录是wp-content/upload |
| 存储 | nfs01 | 192.168.10.31、172.16.1.31 | 共享目录:/uploads/wordpress,所有用户都压缩,nfsnobody |
流程:
1、存储服务器准备共享目录:/uploads/wordpress
2、web服务器用户上传的目录:wp-content/upload,用户上传的目录已经有内容的话,需要移动出来,挂载存储后,再移动进去
3、上传测试
1)存储服务器
1、安装nfs、rpcbind
[root@nfs01 ~]#yum install -y nfs-utils rpcbind2、创建共享目录
共享目录:/uploads/wordpress,属主属组:nfsnobody
[root@nfs01 ~]#mkdir -p /uploads/wordpress
[root@nfs01 ~]#chown -R nfsnobody.nfsnobody /uploads/wordpress/
3、配置文件
[root@nfs01 ~]#vim /etc/exports
/uploads/wordpress/  172.16.1.0/24(rw,all_squash)
5、启动rpcbind、nfs服务
[root@nfs01 ~]#systemctl start  rpcbind
[root@nfs01 ~]#systemctl start  nfs
2)web服务器
1、web服务器安装nfs
[root@web01 ~]#yum install -y nfs-utils2、备份已经上传的数据
[root@web01 ~]#cd /app/code/blog/wp-content/
[root@web01 /app/code/blog/wp-content]#mv uploads/ uploads.bak
3、创建uploads/目录
属主属组为nginx
[root@web01 /app/code/blog/wp-content]#mkdir uploads
[root@web01 /app/code/blog/wp-content]#chown -R nginx.nginx uploads
4、挂载
把 /app/code/blog/wp-content/uploads/目录挂载到nfs服务器的共享目录/uploads/wordpress/中
[root@web01 /app/code/blog/wp-content]#mount -t nfs 172.16.1.31:/uploads/wordpress/ /app/code/blog/wp-content/uploads/永久挂载:
[root@web01 ~]#vim /etc/fstab
172.16.1.31:/uploads/wordpress/   /app/code/blog/wp-content/uploads/   nfs defaults 0 0
5、把备份的数据移动回 /app/code/blog/wp-content/uploads/目录
[root@web01 /app/code/blog/wp-content]#mv uploads.bak/* uploads/
mv: failed to preserve ownership for ‘uploads/2023/06’: Operation not permitted
mv: failed to preserve ownership for ‘uploads/2023’: Operation not permitted
这个提示是因为,备份的时候是nginx,而到了nfs共享目录(属主属组是nfsnobody),因为用户压缩了,导致两边用户不一致。
解决方法:nfs服务器创建nginx用户,/uploads/wordpress/属主属组改为nginx,nfs配置文件exports添加anonuid、anongid参数,指定nginx用户id和组id,然后重启nfs服务
nfs服务端配置如下:
[root@nfs01 ~]#groupadd -g 1001 nginx
[root@nfs01 ~]#useradd -u 1001 -g nginx -s /sbin/nologin -M nginx
/uploads/wordpress/  172.16.1.0/24(rw,all_squash,anonuid=1001,anongid=1001)
[root@nfs01 ~]#chown -R nginx.nginx /uploads/wordpress/
[root@nfs01 ~]#systemctl restart nfs
总体架构示意图: